Showing posts with label furniture. Show all posts

Campaign Furniture Heaven


kelly green campaign dresser

Have you ever been in Campaign furniture heaven?  It's a beautiful place full of vintage furniture pieces with Campaign Hardware everywhere.  My home is temporarily that place. Although I wish they could all stay here forever, unfortunately I can't keep all the furniture pieces that I love.  Bummer!  Oh well, while all these beautiful pieces of campaign furniture are in my house I will gaze at them and pet them as much as I can.  Until I refinish them and find them new homes and only then will I cry.

campaign furniture

 I have always been a big fan of campaign style furniture.  I own a campaign desk and I have sold a couple campaign pieces in the past.  I love their clean lines, amazing hardware and that they pack a lot of storage.  They are classic pieces that blend well in to traditional as well as modern spaces.  They can be used in both feminine and masculine rooms so they are great for couples with different styles.

This week I was lucky enough to score three pieces of furniture from the same line via Craigslist.  I immediately contacted the seller and made arrangements for pick up that same evening.  When you find amazing pieces like this you have to move quickly because they are hard to come by and when they do , they go FAST!

campaign furniture
campaign furniture
campaign furniture

  
A little while back I also found a nightstand and a side table both with slightly different hardware on them.  The nightstand I also found via Craigslist and the living room table I found while thrift shopping. 

campaign furniture

campaign furniture

 The three pieces that I bought together consist of a dresser with 7 drawers, a 3 drawer chest with a removable hutch and an awesome trunk or chest whatever you want to call it.  The trunk is amazing!  It has a drawer on the bottom which needs fixing and the top opens upwards and it holds itself up in place.  It is missing a couple corner brackets but not to worry I am going to replace them.  It also has pulls on the sides.  It is just a stunning piece!  A couple of the drawers on the dresser need fixing too.  Hopefully it won't be too much work.  All the pieces have dings and scratches that need patching.

campaign furniture
campaign furniture
campaign furniture

Can you tell I love the trunk, it's already sitting at the foot of our bed and I really want to keep it (sigh!).  The nightstand I originally purchased to use by my bedside but it's a little short.  I was thinking of adding feet to it to make it taller but now I'm not so sure that I want to do that.  I might just fix it and sell it too.  The side table is living in my living room.  It's very deep so it has ample space to put things on top of and the drawer is a nice little place to stash things like magazines and remote controls...  I have a basket underneath it that is the perfect size and it holds some board games.  So that piece is staying for now.

eclectic living roomeclectic living roomeclectic living room

 I'm still not sure what colors I'm going to paint them.  A while back I painted a campaign dresser in a glossy Kelly Green and it was a big hit.  It sold right away and I had a lot of people inquiring about it.  So I'm not sure if I should do another similar piece.

kelly green campaign dresser

kelly green campaign dresser

kelly green campaign dresser

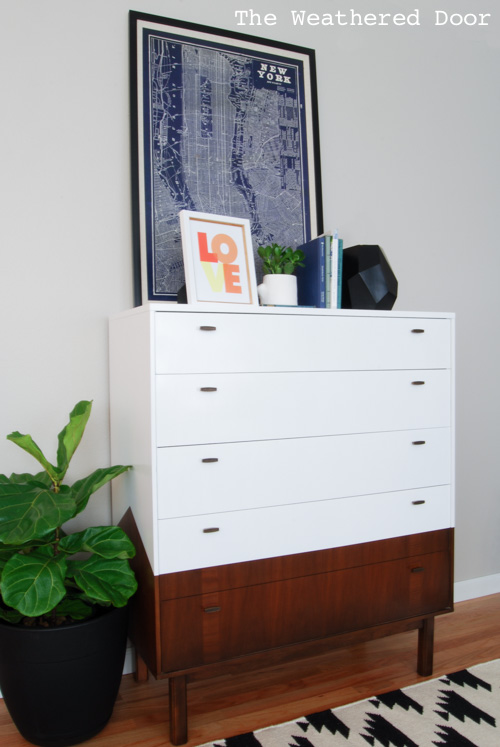
 I also love how my white campaign desk looks.  I feel like white is a classic color for this style furniture.  

white campaign furniture desk
My desk in my home office

I'm so excited that I scored all these beautiful campaign pieces.  Since I have a few of them, I'm glad I get to play around with colors.  I hope they turn out as beautiful as I envision them.  It's going to be hard to let these babies go but hopefully whoever ends up buying these will love them as much as I do already.


Triple Treat MCM Bookshelf


Mid-century modern bookshelf

I was getting in the car on a Friday morning to take my oldest daughter to school and my neighbor from across the street was having a tag sale.  I wish everyday started with a tag sale waiting for you right across from your house.  They were just starting to set up and I figured I would check it out on my way back home but my daughters inherited my jeans they can't see a tag sale and not beg me to go. So I said sure lets check it out.  I spotted this nice big golden deer made of papermache for $1 and I snatched it up.


I took my princess to school and on my way back they had put out more things so I checked it out again with my youngest.  I saw a small bookshelf, it was Mid-century modern (I love mcm), solid wood, had angled shelves and spectacular little feet with metal on the bottom.  At first I didn't buy it because I have been trying really hard not to buy anymore furniture because my basement is full.  So I went inside my house and tried to go about my day but every time I heard a car stop or door slam I would peek out the window to see if the bookshelf was still there.  It wasn't until like the fifth time that I looked out the window that I decided I was going to buy it.  After all if I was going to keep looking out the window every couple of minutes just to be sad if it was gone, I may as well just buy it.  That's logical, right?  I hurried across the street with my little one and told my neighbor I couldn't stop thinking about it so there I was for the third time today.

Mid-century modern bookshelf
It was full of dings and scratches

When I brought it inside I tried google-ing it to see if I could find any similar and low and behold I found a few and they were selling for $150 and up in as is condition.  I went on Pinterest and found the perfect inspiration piece painted and stained.  I new I wanted to do something similar but with different colors.

I wanted to use two different stain colors and white paint.  I did the table below, a MCM side table where I used a similar combination of colors and I wanted to do it again.  This table was one of my favorite pieces that I have done, I was sad to see it go when I sold it.

Mid-century modern side table

I wasn't sure how I was going to incorporate the two stains until I remembered of a piece done by Reeves from The Weathered Door.  Jack Pot I've been dying to make a piece like that since I saw it.  I knew that combining all three of these inspiration pieces was it.  It was going to look amazing.
I soon as I new how it was going to look I got started.  First I filled all the nicks and scratches with wood filler.  Then I sanded the entire thing and in the areas where I was going to stain I sanded the stain completely off. 

Mid-century modern bookshelf


I worked on the feet separately, sanded the finish off.  The metal part of the feet were a little bit rusted so I sanded them as well, and sprayed them with Rust-oleum Universal advanced formula metallic paint and primer in one in the Pure Gold Finish.  It took several coats for complete coverage.   Then I stained them with Rust-oleum Ultimate wood stain in Kona and sealed them with Minwax water based Polycrylic


Mid-century modern feet

With the help of a ruler and a trinagle I measured out the lines where I wanted the angles for the stains to meet.  I used Frog tape and polycrylic between stains to help with preventing bleed through.  For the top stain I used was Rust-oleum weathered gray and Kona for the bottom.     


I didn't get too much bleed through with the stain, now the paint was a different story.  I taped up all the stained areas this was a very tedious and long process.  Then I primed all the the areas I was going to paint twice.  The white paint took five coats to cover so all together it took seven coats.

Mid-century modern bookshelf

Mid-century modern bookshelf

I carefully removed all the frog tape, I used a razor and pulled carefully.  When I finished removing all the tape I was left with a mess of bleed though.

  
  This was a bit frustrating but I did my best to fix it with a razor blade scraping away and retouching.  This happened because I used the poly trick between the coats of stain but I forgot to do it before the painting part.  Now I know for next time.

Mid-century modern bookshelf
  
I think it looks pretty darn good.  I love how the color combination came out.  Now for the fun part, some staging for pictures.

Mid-century modern bookshelf


Mid-century modern bookshelfMid-century modern bookshelf


Mid-century modern bookshelf

Mid-century modern bookshelf


Linked to

Ethan Allen Coffee Table Redesign

Ethan Allen coffee table grey white jacobean stain

Last year I bought this oval, Ethan Allen coffee table at a thrift store.  I gave it a white makeover but when we moved it took a little beating that messed up the table top.  I didn't feel like fixing it at the time so I put it in the basement and forgot about it.  A couple days ago I was itching to paint a piece of furniture.  So I checked my inventory and saw the table looking sad and neglected, begging to get out of the basement.  It wanted to give it another completely different makeover.  Below is what it looked like when I first brought it home and after the first makeover.

Ethan Allen indented on bottom of table top

  I wanted to recreate the color scheme of a table I had done before.  So I needed to change the color of the table from white to grey and I wanted a layered overtime effect and a stained top.  The table shown here is the one I wanted to recreate the color scheme of.


So I started by sanding the top off completely but leaving some white paint all around the edge.  I felt like the bottom could benefit from a shelf.  At first I thought I would cut a piece of plywood and attach it to the bottom but then I got the idea of doing a slatted bottom instead.  So I measured the bottom to get my measurements for the slats.  I enlisted the help of my husband to make the cuts because he is faster than me.  He was happy to help!

Ethan Allen coffee table grey white jacobean stain

After I had all the pieces cut I sanded them and made the pocket holes with my Kreg Jig.  I vacuumed all the pieces and the coffee table and then cleaned everything off with a damp cloth to get all the dust off.  Then I decided I wanted to give the table a little bit more of  a distressed character look (aka beat the crap off the top with random tools).  After I was done distressing it I gave it another light sanding to smooth out some of the tough love and cleaned it again.

Now it was ready for the fun part.  I picked Minwax Jacobean stain for the top and Pantone's Griffin paint for the bottom.  I stained the top using a foam brush and a lint free cloth to remove the excess stain.  I also used a foam brush to apply stain blocking primer to the slats.

Ethan Allen coffee table grey white jacobean stain

 I used a 2" angled brush to paint the base of the table and the slats.  Once I started to paint the top in Griffin, I didn't like it.  I needed a darker grey to have more contrast between the exposed white edges.  So I grabbed one of my Valspars Signature grey colors, (sorry I don't know the name of the exact color) and went over it with a couple coats until I got full coverage.  I painted the slats before attaching them because it was easier this way and after I was done attaching them I could do a last coat of paint on the whole thing to fix any nicks and scratches.

Ethan Allen coffee table grey white jacobean stain

 Then I removed the table top to seal it with Minwax Gloss Polycrylic.  I did three coats for protection and durability and I sanding in between each coat to smooth out any bubbles.

Ethan Allen coffee table grey white jacobean stain

While the table top dried I turned the base upside down to measure and attach all the slats.  I forgot to take pictures of this step because this step was very long and tedious.  I was just in my zone, trying to get it done!  I was half way through screwing the slats when I realized I measured wrong, ugh! I had to unscrew all of my work and start all over again.  I hate when that happens!  Oh well, I measured again and I did it right this time.  Then I cleaned up the sawdust created by the screwing and gave the whole table one last coat of paint, outside, inside and under.

Ethan Allen coffee table grey white jacobean stain

The next step was to distress the base of the table with sand paper to give it even more character and show the layers of paints, primer and wood.  After distressing the base I sealed it with polycrylic for added durability.

Ethan Allen coffee table grey white jacobean stain

 I waited for everything to dry to put it back together and throw pictures of it outside.

Ethan Allen coffee table grey white jacobean stain

Here are a couple close ups of the distressed paint.

Ethan Allen coffee table grey white jacobean stain

Ethan Allen coffee table grey white jacobean stainEthan Allen coffee table grey white jacobean stain

Ethan Allen coffee table grey white jacobean stain

And the distressing I did on the top with random tools.  I love this!

Ethan Allen coffee table grey white jacobean stain
 Ethan Allen coffee table grey white jacobean stain distressed
I made some faux wormholes 

I also did some indoor styled pictures for fun.  Please don't mind the golden reindeer in front of the fireplace.  No I'm not getting ready to decorate for Christmas way before Halloween.  I just bought it this weekend at a tag sale and placed it there to send a picture to my hubby of my $1 tag sale score and I haven't put it away yet.  Who knows it might just stay there until Christmas and then I will put it away after ;-)

Ethan Allen coffee table grey white jacobean stain

I am so happy I decided to add the slatted shelf on the bottom.  I was able to add storage to the bottom of the coffee table and give it some more character.  Now it can be used to store books, magazines, board games or with some cute woven baskets to hide unsightly junk, or extra throws and pillows......

Linking up to

Related Posts Plugin for WordPress, Blogger...