Showing posts with label Staining furniture. Show all posts

Curbside Cabinet Makeover


Curbside Cabinet Makeover

A few weeks ago I shared pictures on Facebook and Instagram of a curbside cabinet that I brought home to give it a makeover.  This cabinet had lots of dirt, cat hair and cat scratches.  It was pretty gross but nothing a little, no who am I kidding, a lot of elbow couldn't fix.

Curbside Cabinet Makeover

I started by vacuuming the cabinet inside and out.  Then I wiped it down, it was filthy I used up all my Clorox wipes.  I also cleaned it with TSP.  Next I removed all the hardware and the kick-plate.  I filled all the holes and cat scratches with wood filler.  Then I sanded the top off to bare wood and lightly sanded the body and areas where I had applied the wood filler.

curbside cabinet makeover

Curbside Cabinet Makeover

I made the new holes for the new hardware and got a piece of wood cut to size for the new bottom kick-plate.  There was nothing wrong with the kick-plate it came with. Its just that this cabinet really wanted to be a boy cabinet so it needed a straight bottom.  The other kick-plate looked like a girly skirt on it.  I also bought a pack of wooden buttons, because it was missing a few and I needed to cover the screw holes on the new kick plate.  I painted the cabinet a rich medium grey and stained the top and sealed it with multiple coats of polycrylic.

Curbside Cabinet Makeover

Curbside Cabinet Makeover

Curbside Cabinet Makeover

The back cover panel had holes in it so I bought a new one and attached it with screws.  I painted the inside of the back panel in the same grey as the body and sealed it.  I left a piece of wood in the middle exposed and the sides because I like the way the wood tone looks with the grey.  I also lined the drawer with a fun mustache fabric using Modge Podge and sealed it with Polycrylic too. 

Curbside Cabinet Makeover

Curbside Cabinet Makeover

Curbside Cabinet Makeover

Curbside Cabinet Makeover

Now there's no mistaking this cabinet for a girl, it's definitely a boy cabinet. No more tiny little ceramic knobs or frilly skirt.  Now its got chunky hardware, mustache fabric, straighter lines, and two tone stain with masculine grey paint.

Curbside Cabinet Makeover

Curbside Cabinet Makeover

 I brought it in to the kitchen for a little staging fun, because that's just the way I am, I like staging pieces.  I actually had to take down my recycling bins from the wall to take these pictures.

Curbside Cabinet Makeover

Curbside Cabinet Makeover

Curbside Cabinet Makeover

 If only the person who left this by this cabinet by the curbside could see this makeover!  Can you believe I found this cabinet on the same street, the house right next door to where I found this Roadside Side Table that I gave a makeover to months ago?


Charcoal Grey Mahogany Sideboard


Charcoal Grey Vintage Mahogany Sideboard

On a shopping trip to Goodwill, I spotted this vintage mahogany sideboard and snatched it up right away.  It took me about a week or so to get started working on it because I couldn't decide on a color for it.  My head was sniping all over the place, so I looked for inspiration in Pinterest and that made it worse because then I had a ballillion choices.  I finally had a vision in my head of how I wanted the piece to look.  My gut was telling me to paint it in a dark charcoal grey with the middle section in a light grey and stain the top.

Charcoal Grey Vintage Mahogany Sideboard

Charcoal Grey Vintage Mahogany Sideboard

I started by sanding the top finish off completely working my way from coarse, to medium, to fine grit sand paper for a smooth finish.  I gave the body a light sanding with fine grit too.  Then I filled some spots where the veneer was missing.  Rustoleum's Kona gave the top a nice, even tone.  I mixed my own chalk paint for this piece.   After a few coats of each color, I let the paint dry over night and came back the next day and sanded the whole piece to remove any bumps and lightly distress the edges.  I sealed the bottom portion with Minwax polycrylic in satin and the top in gloss finish.

Charcoal Grey Vintage Mahogany Sideboard

I liked the original hardware but I wanted to remove the years of tarnish, to give them a fresher look.  I used Bar Keepers Friend, it was working quite well.  They were a nice brassy color underneath, unfortunately two of the hardware pieces had a silver tone to them.  I needed another solution so I thought about using Rub and Buff.  I've never used it before but read good things about it.  I went to two different craft stores near by and neither of them carried it.  One of them had a similar product called Metallic Luster.  I bought it, took it home and tried it out but it was a bust.  It didn't work for me, it was too much of a bright gold and the finish was translucent.  Maybe I didn't do it right, I don't know.  Anyhow I finally found Rub and Buff at Hobby Lobby and it worked like a charm.
     
Charcoal Grey Vintage Mahogany Sideboard
Charcoal Grey Vintage Mahogany Sideboard rubb and buff hardware

The decorative trim from the top back was missing so I picked up a piece of 1x2 at Home Depot.  My hubby cut it for me and then I screwed it in from the back, stained it and sealed it.   I also added some wooden corner pieces as supports to give it more stability since it is such a top heavy piece.

Charcoal Grey Vintage Mahogany Sideboard

Charcoal Grey Vintage Mahogany Sideboard

I am totally in love with how this Charcoal Grey mahogany Sideboard came out.  I wish I had a bigger house so that I could keep it!  I say that a lot but it's not true, I actually love that our house is not so big, it's perfect for us.  I guess what I mean is, I wish I needed it or had a spot for it at home, but I don't so hopefully this vintage beauty finds a perfect home soon.

Charcoal Grey Vintage Mahogany Sideboard

Charcoal Grey Vintage Mahogany Sideboard

Charcoal Grey Vintage Mahogany Sideboard

Charcoal Grey Vintage Mahogany Sideboard

Charcoal Grey Vintage Mahogany Sideboard


Charcoal Grey Vintage Mahogany Sideboard

Charcoal Grey Vintage Mahogany Sideboard


Charcoal Grey Vintage Mahogany Sideboard

Linking up to

Refinished Roll Top Desk


Refinished roll top desk

This is my first ever refinished roll top desk!!!!!!  This was, gosh , I am not going to lie, a little bit of an intimidating project for me. When my customer arrived with the bookshelf I was going to paint for her, she also brought a little desk and a chair and asked if I could refinish them too.  Of course I said "sure!"  Inside I was thinking, this looks tricky with the roll top and the cubbies but I was still confident I can do it, I just wasn't sure what techniques I had to use.  She didn't need it right away so I had plenty of time to study the desk and research techniques that I could use on it.  

Refinished roll top desk
Before both pieces

Refinished roll top desk
Before, very and white film over stain
Refinished roll top desk
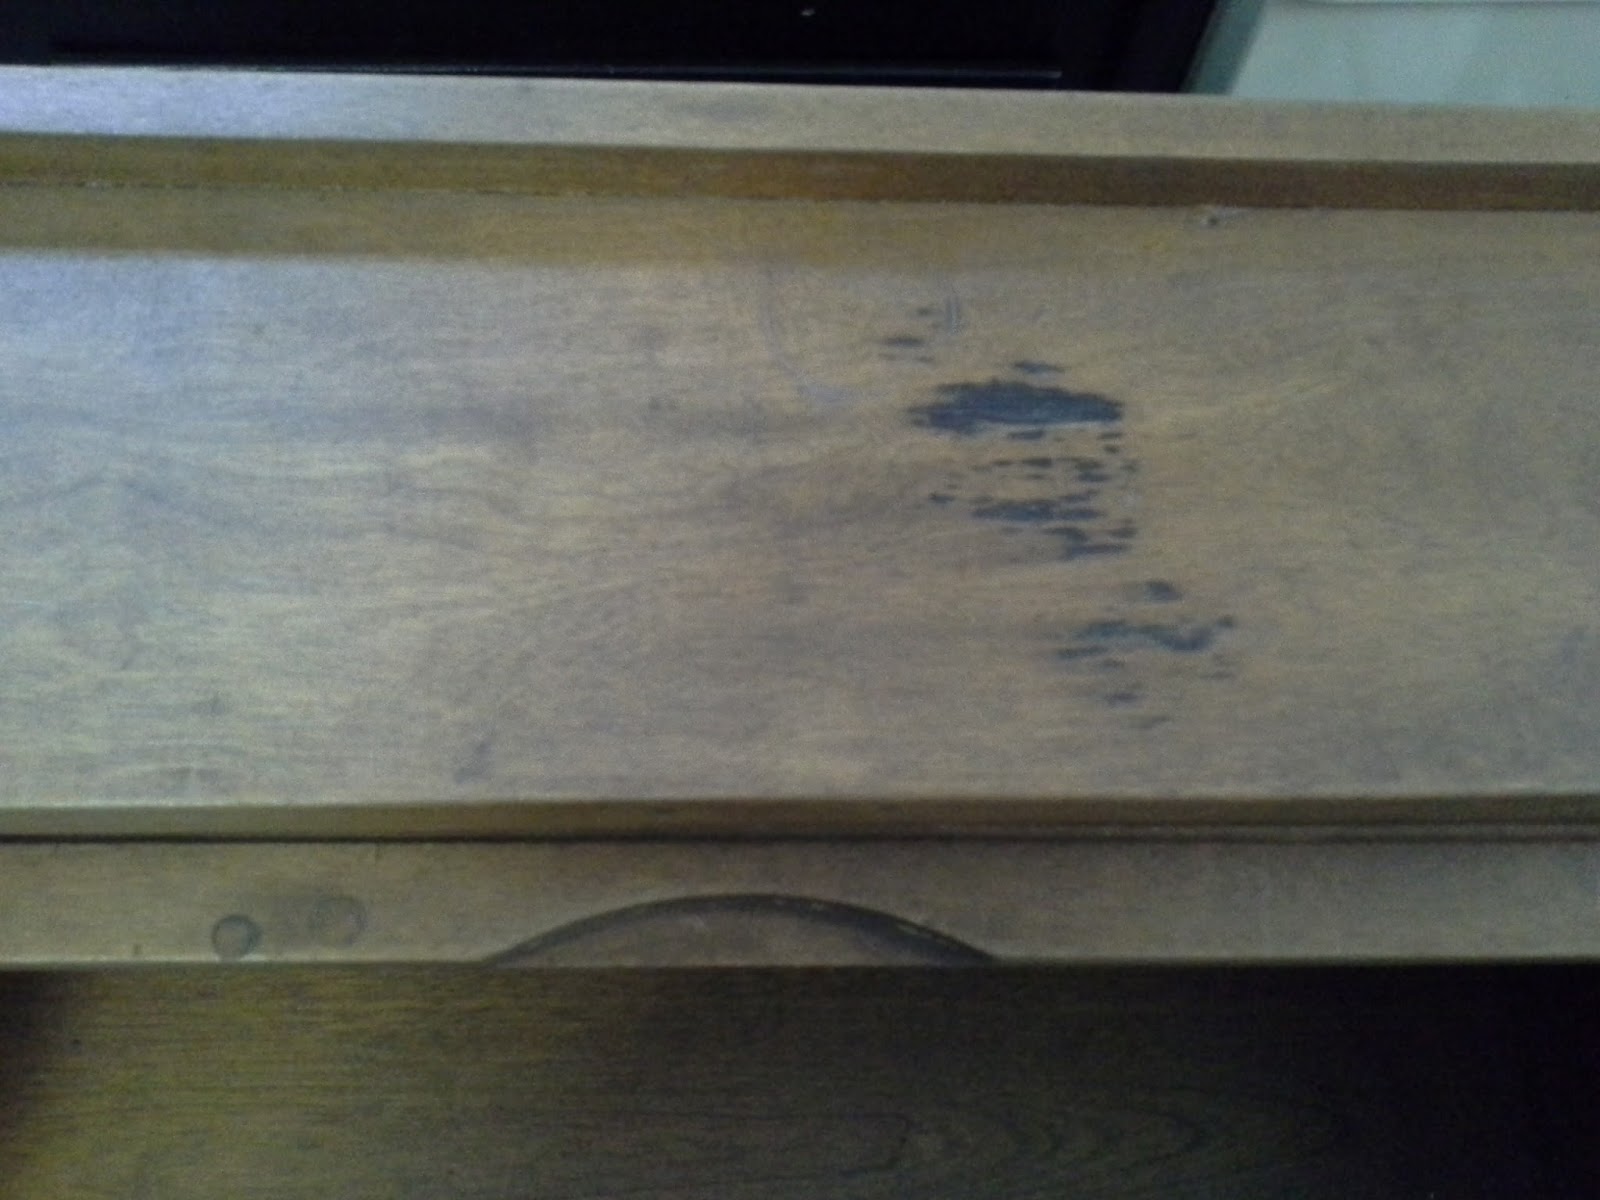
Before, gap on top of roll top cover, black burn mark
I decided I was going to sand the whole thing down and re-stain it.  First I had to take it apart into as many pieces as I could.  I removed the drawers, took four screws off from underneath the desk top to remove the top with the cubbies and slid off the roll top cover.  I took one of the drawers with me to Home Depot to match the original stain and bought some supplies that I needed to refinish it.

Refinished roll top desk

I went home, sanded the finish off everything and I worked on the chair.  The chair legs were loose and the seat was coming off so I fixed everything up, stained it and sealed it.  I decided to work on the desk later because we where working on the kitchen cabinets and my customer did not need this done until March, for her granddaughters birthday.

Refinished roll top desk, antique chair
Before, dull and scratched up

Before, lots of wood filler, unstained piece of wood
At the end of January I checked in with my customer and she surprised me by asking if I could finish it before Valentines Day instead.  Two weeks was more than enough time so I replied yes.  I told her once I finished the kitchen cabinets that week I would get it done for her.  Usually I would put the customers furniture before my own, duh!  But I was in a time crunch for the kitchen to get done because I was planning a surprise birthday party for my mom and my kitchen and dining room were in complete disorder.  The stupid kitchen cabinets took way more time than we bargained for.  I was still sealing them and putting on hardware the morning of the surprise party.

Mid way through kitchen cabinet makeover read more about it here and here

Anyhow after that was over, I got right to work on the desk, another sanding, cleaning and staining.  Something was bothering me though, the desk had a huge burn mark that I tried sanding and it wouldn't go away.  So I tried scrapping it with an exacto knife and it was a very deep burn so I had no choice but to fill it with wood filler.  I don't like wood filler too much because the stain never matches and this was a huge hole to fill.  I continued to add more and more stain to it but it kept coming out much lighter no mater how much stain I used.  I tried matching the stain color with acrylic paint but it looked bad so I wiped it off and tried a darker stain color and this finally worked!  You can still see the mark where the burn was but it's much more blended now and I am very happy with the results.

Black burn mark before sanding
After stained and blended
I asked my customer if I could change the existing wooden knobs for vintage glass ones and decoupage the drawers with pretty paper and she loved the idea.  I asked her what was her granddaughter's favorite color so that I could get the scrapbook paper in that color, she replied "pink and purple (my daughters favorite colors :-)."  I bought the knobs at Home Depot and went to Michaels for the scrap book paper.  I wanted the paper to have little flowers to stick with the vintage feel of the desk and the hardware.  I found these pretty options, I only ended up using three of them.  I decoupaged the drawers and did the same to the backs of the cubbies because I'm nice like that!

Refinished roll top desk, scrap book paper, vintage glass knobs

Refinished roll top desk

Finally it was time to clear coat it.  I used multiple layers for extra protection, after all it is a kids desk!  I waited a day before I put it all back together.  After I screwed in the top I noticed the gap on the roll top.

Refinished roll top desk

Refinished roll top desk
Huge gap!!!

I tried fixing it by screwing a pair of short, round head screw in the groves where the roll top sits.  I predrilled the holes first so that the wood wouldn't split.  I put everything back together and it worked, now there's a smaller gap on the bottom instead of the top which is a lot less noticeable.


Refinished roll top desk

Refinished roll top desk


But... of course, there's always a but, the roll top wouldn't slide smoothly.  This could drive the little girl nuts, when she tries to open and close it.  So I disassembled everything once again, and I used a birthday cake candle (leftover from my mom's surprise birthday party) and glided it up and down the groves and on the roll top itself.  Then I screwed everything back together again and it glides much smoother now, so hopefully the little girl wont get frustrated when opening and closing her desk.

Refinished roll top desk

Refinished roll top desk

That's it!  The desk is done and I'm in love with it!  I'm so glad my customer liked the idea of adding the paper and the glass knobs, these little details make all the difference.  I love peeking inside the drawers and cubbies to see the pretty paper.  I wish I was 4 years old and my customer was my grandmother so that this little desk could be my Valentines Day gift!  

Before

Refinished roll top desk, vintage glass knobs
After

Refinished roll top desk

This was a long post but I just wanted to share how I refinished this roll top desk.  I skipped a few things, like, how I bought an antique refinishing product, that I then realized had a bunch of Warnings and Danger signs.  I opted out and went with my good ole sanding, staining routine.  I didn't take a lot of behind the scenes pictures either (bad blogger, I know) I was too focused.  I did a lot of research and thinking, I took it one step at a time, and I did a few trials and errors and improvising where I needed.  This ended up being a very thoughtful process and a very fun project. 

I know I owe you guys some kitchen cabinet makeover pictures but that will be on the next post!  So stay tuned for that!!  

Linking up
Related Posts Plugin for WordPress, Blogger...