Showing posts with label Kitchen. Show all posts

Lining Shelves With Contact Paper


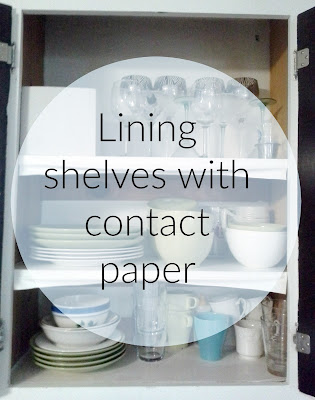
Lining shelves with contact paper, kitchen cabinets

It all started when I wanted to drink a cup of tea!  Now what does drinking a cup of tea and lining shelves with contact paper have to do with each other, you ask!  Well the cabinet was overstuffed and when I reached out for the tea box, it and other miscellaneous stuff fell out of the cabinet.  I thought to myself, while the water for my tea simmers I can quickly empty out the cabinet and reorganize it, it's just a small cabinet it wont take more than 5 minutes, right?  Wrong, wrong, wrong!!!!!
Lining shelves with contact paper, kitchen cabinets

I emptied it out and the contact paper that was put there by one of the previous owners was hanging in the front and I decided it was time to pull it off!  Well, once I pulled it off I remembered why it was still there in the first place.  When we first moved in, I went to remove the contact paper from one of the other cabinets and there was another paper underneath it that was torn around the edges and I tried to remove it but that thing was super glued.  I decided it was a job for another day (or year) and I put everything in the cabinets and called it a day.  That was a year ago, and now the day has come, a year later, but nevertheless the day is finally here!!!!
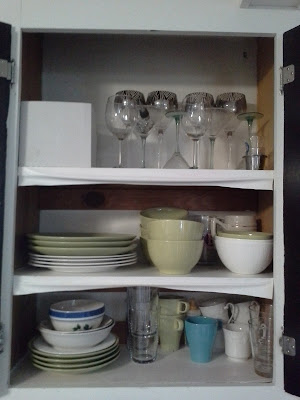
Lining shelves with contact paper, kitchen cabinets

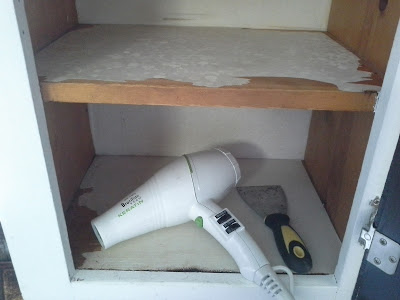
The water for my tea was simmering so I poured it in a cup with my tea and let it sit while I got to work.  I went and grabbed my hair dryer and a spatula to remove the older contact paper.  I just applied some heat and used the spatula to scrape away the paper and it wasn't too bad.  I did another shelf, and another and pretty soon I was taking things out of all the other cabinets and removing more paper.

Lining shelves with contact paper, kitchen cabinets

By the time I realized my kitchen was a disaster zone, my tea was cold, my kids were hungry and my husband was coming home from work soon and he too would be hungry.  I thought I could give them a quick clean up and put everything back away, but the shelves were so sticky now.  I tried cleaning them with rubbing alcohol and it wasn't working.  Now what?  I hadn't though this far, but it was too late, I was in too deep, there was no going back now.  I had to make a decision quickly, so I decided I was going to have to buy more dreaded contact paper.
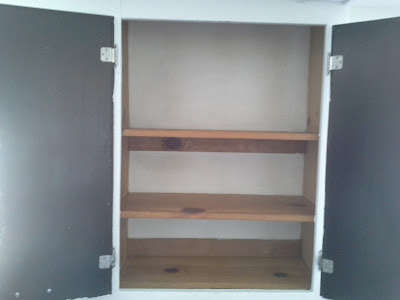
Lining shelves with contact paper, kitchen cabinets
I like how the bare wood looks but it was too damn sticky

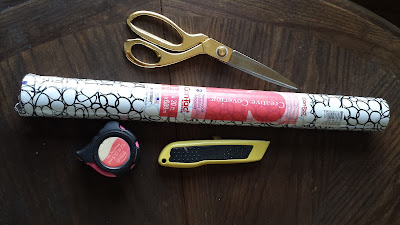
 I searched online and I found contact paper has come a long way, there are so many beautiful options.  The only problem is I needed something quickly accessible, I didn't have the luxury of waiting for beautiful contact paper to be shipped from God knows where and arrive a week later!  I needed something now!  So I checked online for my nearest stores and finally settled on this one from Target.  The next day I  purchased the contact paper, went home, gathered some supplies to use with the contact paper and got to work on that.
  • Pretty contact paper
  • Golden scissors 
  • Pink measuring tape
  • Hubby's ugly box cutter
  • Goodwill card to smooth out the paper (not shown)
*Funny fact, as I'm working on this I tell my husband "you know what song just wont stop playing in my head?  "I'm gonna pop some tags" by Macklemore"  
He says to me "it's because you have the Goodwill card out"  
I say "ugh, that's so funny, I didn't realize that, now I wanna go thrift shopping." 

Lining shelves with contact paper, kitchen cabinets

 After I was done with a few of the shelves I wasn't liking how the pine cabinets and the wall behind was looking with the contact paper so I thought about painting them.  It began to dawn on me this project was almost never ending!  I mean all I wanted was a cup of tea and then I was lining the shelves with contact paper and now I wanted to paint the inside of the cabinets.  Our kitchen has been under construction with this little project for a couple days now.  I told my husband I was going to leave the inside without painting for now because it would be easier if I could remove the doors so I should leave that for when we had planned to repaint the cabinets in the summer.
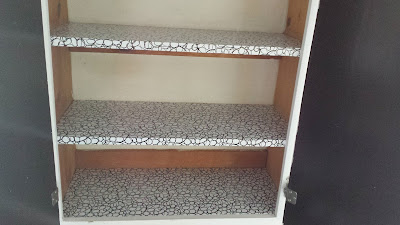
Lining shelves with contact paper, kitchen cabinets
You can't see it here but the wall behind was stained and yellowed

What happened next was unforeseen, my husband says "take the doors out, we will do it this weekend", I asked "do what this weekend?"  He said "paint all the kitchen cabinets", I told him "if we are going to paint them we have to do everything the right way, that means we have to sand them and all that" and he said "yes, I know!"  I told him, "don't tease me I have the drill on my hands!"

Lining shelves with contact paper, kitchen cabinets

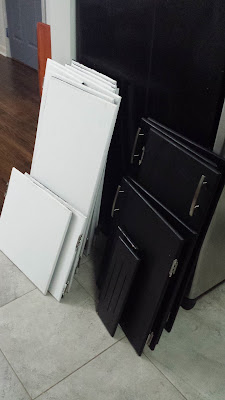
Next thing you know I'm removing doors and we are in the middle of an even bigger project now!  The outside of the kitchen cabinets are getting a makeover too, I told you this was a never ending project.   We are now on week two of working on the cabinets, my kitchen and dinning room are "Hazardous Work Zones!!!"  We have been sanding, striping, priming...  I can't wait to see the finish line and share the results of course!

* See pictures of our first kitchen makeover here! 
* For pictures of our recycling station in the kitchen, check out this post! 

Linking

Trones in the Kitchen


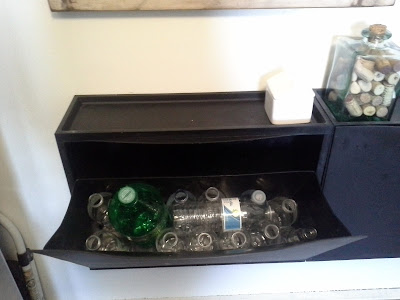
Ikea Trones in the kitchen for recycling, recycle

Last time when I shared the Lightening up the Kitchen post, I shared this picture below of where the refrigerator is placed but I left out the after pictures from this view.


We switched out the old refrigerator that came with the house with a stainless steel one and we added a little floating recycling center on the wall to make it more functional.  The door-less cabinet is still in the same state and I know now it looks a little off  and the fridge isn't as close to the wall as it should be because of the baseboard heater.  I really feel like the fridge should be moved to face the other side of the kitchen for a better flow between work stations.  If we do that we would have to move the cabinet on top and replace the trim, it seems simple but there's a lot more work involved that we don't have time for right now.  Instead we focused on making it more functional for the time being.

Ikea Trones in the kitchen for recycling stainless steel refrigerator

To keep the recycling at bay we utilize the Ikea Trones.  I know their description says they are for shoes but when I saw them I thought they would be great for recycling and I was right, they are.  Ours are black so they look good with the bottom black cabinets but they come in different colors.  I styled these pictures for this post but usually I have a bunch of crap on the tops of the trones.  I really want to keep the tops clear so I plan to add a wood top to them to make them more decorative and custom.  I'm hoping this will encourage me to keep the top clean and pretty.

Ikea Trones in the kitchen for recycling, stainless steel refrigerator DIY Chalkboard

I made the chalkboard frame on the wall with simple 1x2's and a cheap backer board panel painted with chalkboard paint.  I wanted it to look a bit rustic and old so I painted and distressed the frame, drilled holes for the twine and found that big black bracket in the basement and thought it would look cool if I used it to hang the chalkboard from.  It is another functional piece for the kitchen to write grocery list, reminders etc...The old wooden bowls I bought from a thrift store.  I bought some saw tooth hangers from the hardware store and nailed them to the back of the bowls to hang them on the wall.  I have always had a calendar in the kitchen no matter where we live it's just a habit to write things on it like appointments, days off, vacations and other important events.  It is very handy for our family.

DIY Chalkboard Ikea Trones in the kitchen for recycling, recycle

As you can see our kitchen is open to the dining room.  I know some people prefer closed off dining rooms but I really like it this way, in fact I wish the the kitchen was open into the living room too but that's just not the case.  We would love to some day open these rooms up in to each other but that seems like a project outside of our DIY-able knowledge and budget so for now we will work with this layout.  Still something to consider for the future.

open kitchen dining room stainless steel refrigerator

For now we are enjoying slowly making improvements and making the house more functional for our family's needs.  We recycle a ton in our house everyday and having these recycle bins in the kitchen where most of the action happens is very convenient for us.  They hold a lot and are easy to remove and carry them outside to the recycling cans on waste pick up day.  Their simple lines make them an attractive solution and also makes them very easy to wipe clean.  Needless to say we love our recycling center.  

Ikea Trones in the kitchen for recycling, recycle
                   
Linking up to

Lightening Up The Kitchen


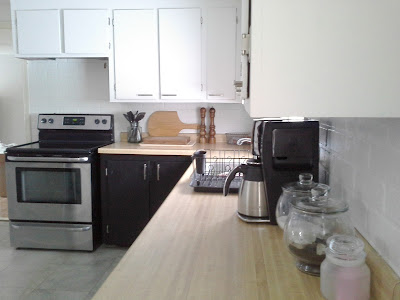
When we bought our new house we inherited a  fugly kitchen.  From day one I started thinking of some inexpensive, quick fixes we could do to make it more our style until we could afford a major remodel.

Black white tuxedo kitchen painted faux brick

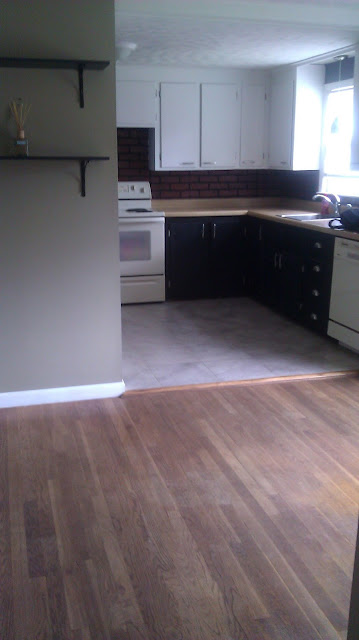
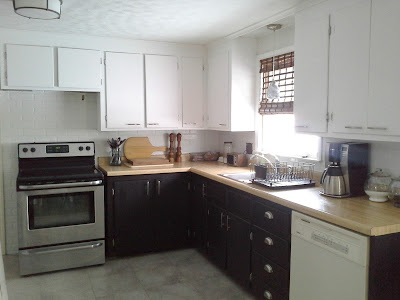
The kitchen walls were painted a dark blue, and the cabinets are white on top and black on the bottom.  They are painted in flat finish and they were not primed, you know what that means, right?  When you try to clean them the paint comes off and all the dirt, oil and wine splatters are absorbed into the flat finish, leaving dingy splotches everywhere.  Even the ceiling is painted in flat white and it has wine splatters on it.  I know what you are thinking, how on earth does one get wine up on the ceiling?  It's irrelevant!

white black tuxedo kitchen painted faux brick
Before
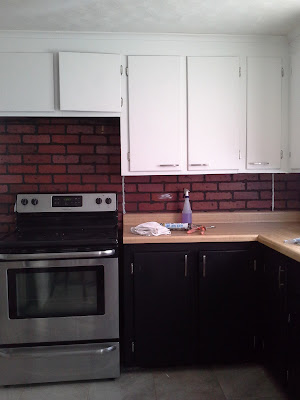
 The appliances were beige and the fridge had "faux" wooden door handle. The kitchen also came with a "fabulous" faux brick back splash and an even more "fabulous" faux butcher block counter top, It's "fauxbulicious"!  I can go on and on about the negatives but let's just focus on the things that have improved since we've moved in.

Before

The first thing we tackled was to paint the walls in Behr's Irish Mist.  I had the paint matched to Glidden's premium paint and primer to save money and I used semi gloss finish to make it easy to wipe clean.  Then we replaced the appliances with our own stainless steel appliances.  We haven't changed the dishwasher yet because I have never used a dishwasher in my life, so I have no idea if I even want a new one or just add storage in it's place.

white black tuxedo kitchen painted faux brick


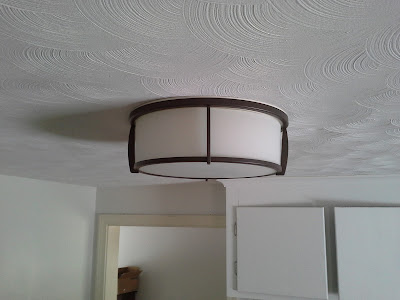
 We also switched out the overhead light fixture for this Allen + Roth ORB flushmount from Lowes.  It looks ten times better than the small, white, boob light that was there before.

Allen Roth Oil rubbed bronze flush mount light fixture lowes

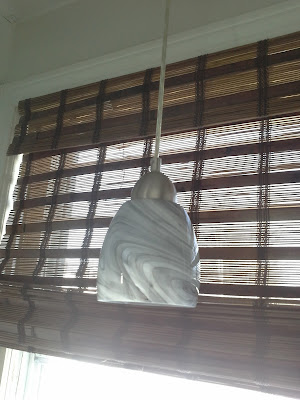
Next up, I changed the white vinyl mini blinds for a nice, textured, woven shade from Home depot.  It looks like they don't carry the same ones anymore the closet match I could find was this one, Radiance Cocoa Havana bamboo roman shade.

white black tuxedo kitchen
With white vinyl mini blind

marbled hanging pendant woven shades
The nice, woven, textured shades

Lastly I painted the faux brick in the same paint as the walls.  Now the kitchen feels lighter and brighter and I don't hate the brick as much as I used to.

Black white tuxedo kitchen painted faux brick

Black white tuxedo kitchen painted faux brick

Below are some of the other things we would like to do to the kitchen in this for now phase

  • Prime and paint the trim and ceiling semi gloss white.
  • Sand and repaint the cabinets, the paint job was done very poorly.
  • Change out the hardware on the cabinets.
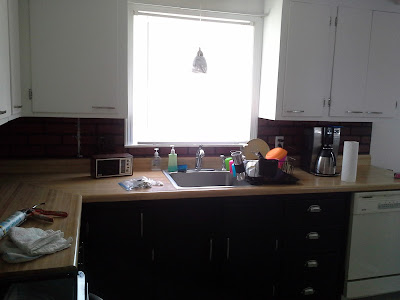
  • Replace the hanging light fixture over the sink with something more our style.
  • Do something about the wasted space over the refrigerator.

There are a lot of other little improvements we are letting simmer before we make any decisions because we don't want to spend a lot of money on temporary fixes.  The short list above will help us get by until we save up for a major overhaul.  Sometimes taking your time before doing any extreme changes is better in the end.  This way we can get a feel for how we use the space, what works, what doesn't and what can use some improvements.  The kitchen already feels so much better with just the simple, quick fixes we've done so far.

Linking up to

Building a modern farmhouse dining table


I was seeing a trend on home blogs of building your own farmhouse dining table. I like the idea of saving money and building your own awesome dining table so we decided to build one for ourselves too.  Like a lot of people we used ana-white.com for free easy awesome plans.  I am now addicted to Ana's website. I want to build everything in our house from scratch but my husband doesn't share the same feeling.


modern farmhouse dining table

We had a smaller table with 4 chairs that didn't feel right for our small eat in kitchen which is our only eating space in our home.  So we sold it on craigslist and used the money to buy the supplies for our new table.


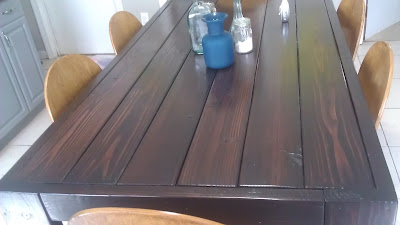
We are in love with our new table and a little obsessed.  We are also very proud of ourselves for building our own super sturdy, awesome, incredibly beautiful, obsessively gorgeous, makes me wanna clean it everyday modern family farmhouse dining table ( I told you I was obsessed).  We used the shopping and cutting list provided in Ana's website and then followed the instructions to a T.


We bought mini hand held Kreg jig.  We had never used one before but it was easy to use and I love that it hides all the screws under the table top.  We also had all of our lumber cut at Home Depot.


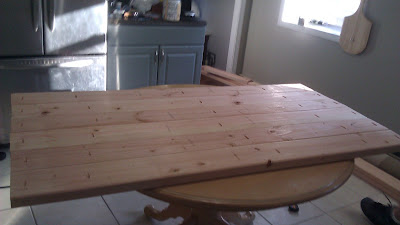
We then sanded the whole table but I don't have any pictures of that part of the process. We taped and covered the whole kitchen with plastic because we sanded it inside the house, crazy I know. We started with 60 grit rough sanding paper, then worked our way to 180 grit medium sand paper and all the way down to 220 grit fine sanding paper. We finished the table with wood conditioner, one thick coat of Rustoleum's Dark Kona stain applied with foam brushes.  We let it sit for 10 to 15 minutes and wiped out the excess with a cheese cloth.  We used  3 coats of Minwax water based polycrylic in satin finish for the top coat. And that's it.  She's a beauty.


And here she is with the chairs we bought through Craigslist.  The chairs are waiting to be painted, I'm thinking glossy white or some other bright pop of color, not sure yet.
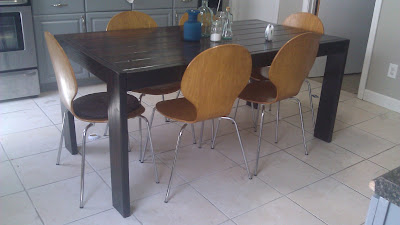
modern farmhouse dining table


I'm in love, it's not perfect but it's not supposed to be.  It's bigger that our old table but the smaller chairs really help to make it feel alot more spacious than before.  It's been about 4 months since we built it and we couldn't be happier with our table, we are totally in love.

Related Posts Plugin for WordPress, Blogger...